
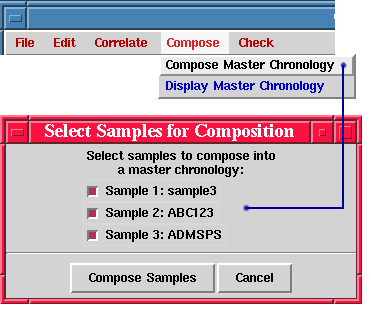
Composing a Master Chronology
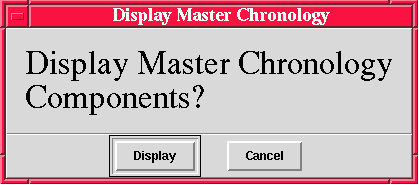
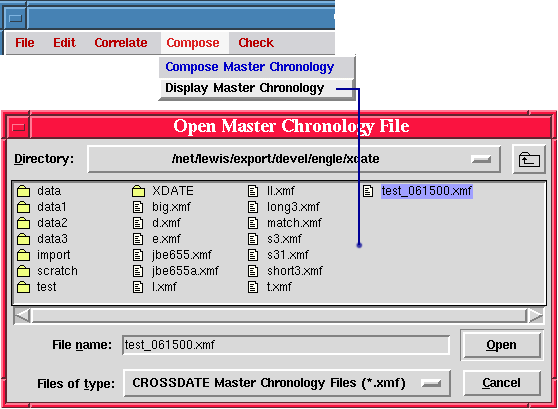
Displaying an Existing Master Chronology
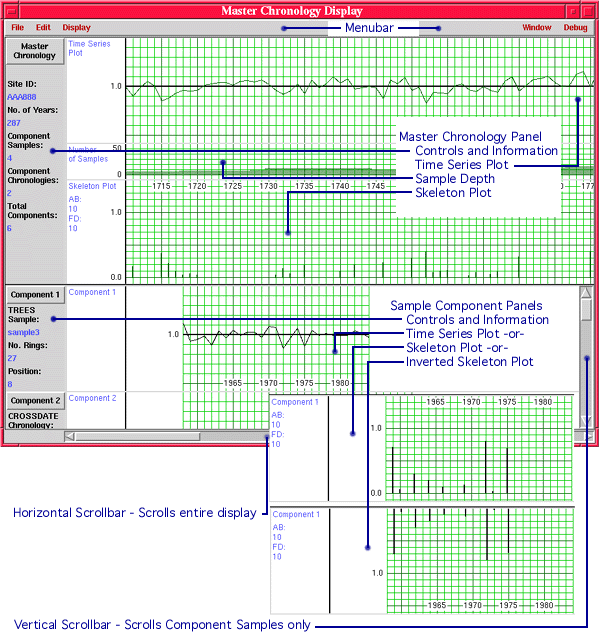
Master Chronology Display Screen
The Master Chronology Component Display (MCCD) screen (Fig. 3.2) is very similar to the main CROSSDATE screen with some exceptions:
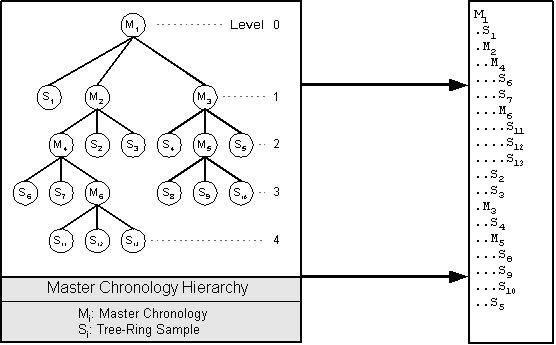
Master chronology files are composed in a hierarchical manner as shown above in Fig. 3.3. The components of a chronology at any level in the hierarchy may be:
By allowing CROSSDATE master chronologies to be composed with other CROSSDATE master chronologies, a large number of samples may be composed into a single master chronology.
Master Chronology Data Errors
In addition to the data required to display the time series plot, the sample depth plot, and the skeleton plot, the master chronology file stores references to the sample component files that contain the data required to display sample information in the component panels. If a sample component file has been deleted or moved from where it is expected to be, CROSSDATE will generate an error message and be unable to display the component.
It is very important when composing a master chronology from several intermediate chronologies that no intermediate chronology is used more than once in the hierarchy. This condition is known as a "Circular Reference" and will generate an error message in the process of composing a master chronology. The CROSSDATE program will not allow a master chronology with a circular reference to be composed.
Master Chronology Display Menus and Controls
Master Chronology Component Display Main Menu
The following main menu options are provided for the Master Chronology Component Display (MCCD) screen (Fig. 3.4.1):
File Menu:
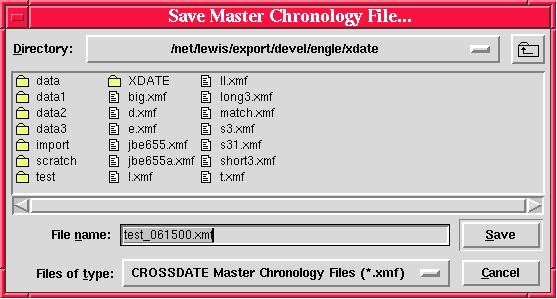
File -> Save Master Chronology - Saves the current master chronology.
File -> Save Master Chronology As - Saves the current master chronology under a different file name.
File -> Export Master Chronology - Creates an ITRDB export file for the current master chronology.
File -> Delete Master Chronology - Deletes a master chronology previously saved to disk. If it is the current master chronology, the MCCD screen is also closed.
File -> Close Master Chronology Display - Closes the MCCD screen after asking if saving the file is desired.
Edit Menu:
Note: Use File -> Save Master Chronology to save any changes made using the following Edit menu functions.
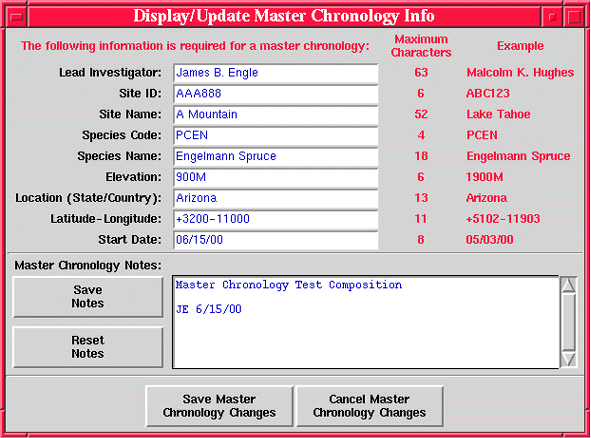
Edit -> Master Chronology Info - Change master chronology header description information (Fig. 3.1.3).
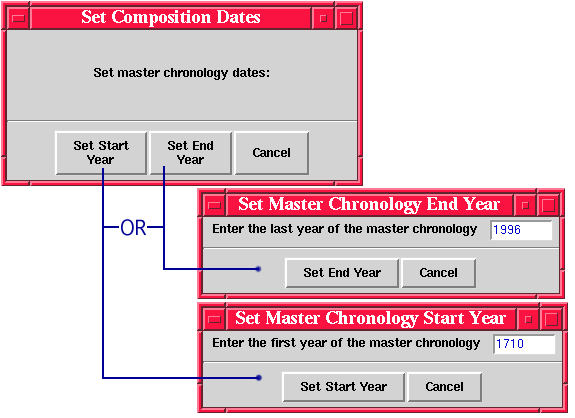
Edit -> Master Chronology Dates - Change the master chronology start or end date (Fig. 3.1.2).
Edit -> Master Chronology Skeleton Plot Cutoffs - Change the absolute difference and first difference cutoff values for the master chronology skeleton plot. (Fig. 1.4.7).
Display Menu:
Display -> Display All Components - Display all of the components of a master chronology (Default).
Display -> Display Sample Components Only - Display only the components of a master chronology that are TREES data file samples.
Display -> Display Master Chronologies Only - Display only the components of a master chronology that are CROSSDATE master chronologies or ITRDB import chronologies.
Display -> Display No Components - Do not display the components of a master chronology.
Display -> Component List Report - Prepare a text report listing all of the components of the master chronology by level with summary attributes (Fig. 3.5). Report screen allows the user to save the report to disk.
Window Menu:
Window -> Minimize - Iconify the MCCD window.
Window -> Close - Closes the MCCD screen without asking if saving the file is desired.

Master Chronology Panel Control Menu Functions
The following control options are provided for the master chronology display panel (Fig. 3.4.2):
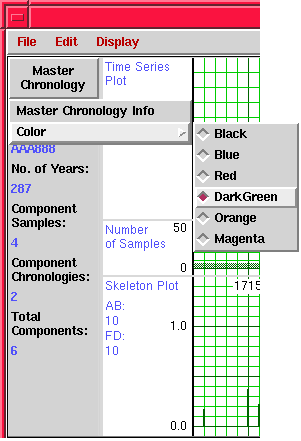
Master Chronology -> Master Chronology Info - Displays master chronology header information (Fig. 3.1.3).
Master Chronology -> Color - Changes the color of master chronology graphic elements.
Sample Component Panel Control Menu Functions
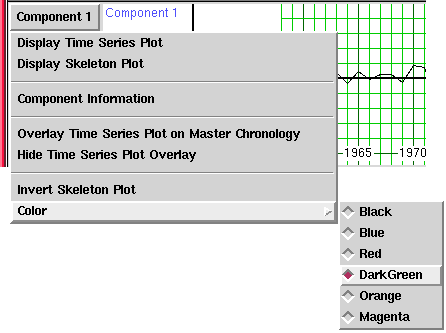
The following control options are provided for each component displayed (n is the component number):
Component n -> Display Time Series Plot - Displays the component ’s time series plot.
Component n -> Display Skeleton Plot - Displays the component ’s skeleton plot.
Component n -> Component Information - Displays the sample component ’s header information panel. (Fig. 1.4.3)
Component n -> Overlay Time Series Plot on Master Chronology - Displays the component ’s time series plot overlaid on the master chronology ’s time series plot.
Component n -> Hide Time Series Plot Overlay - Removes the display of the sample ’s time series plot from the master chronology ’s time series plot.
Component n -> Invert Skeleton Plot - Displays the component ’s skeleton plot inverted.
Component n -> Color - Changes the color of the component ’s graphic elements.
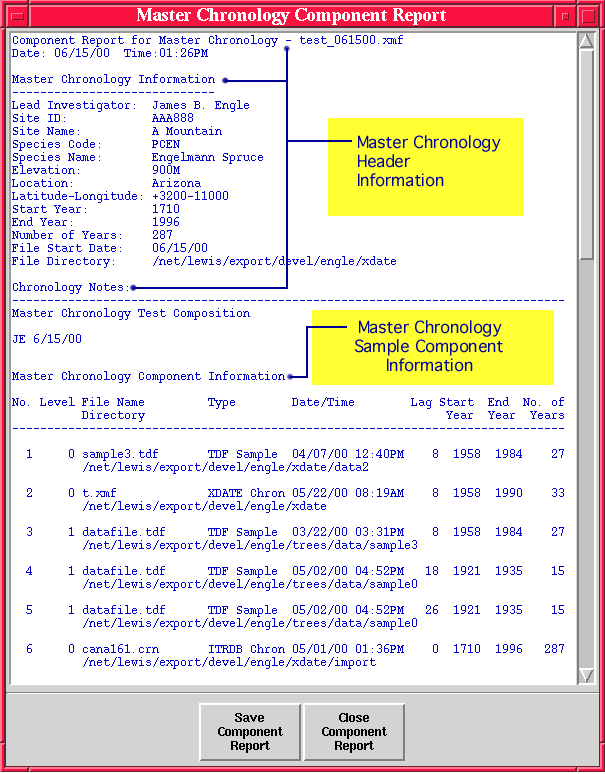
Master Chronology Component Report
A text report listing master chronology header information and sample component information is available from the Display -> Component List Report function from the master chronology component display screen menu. Sample components and intermediate chronologies in the hierarchy are listed in the manner described in Fig. 3.3 and shown in Fig. 3.5.
The report may be saved to disk as a text file (.txt extension) using the Save Component Report button at the bottom of the Master Chronology Component Report screen.
![]()
Last Updated: June 2000
University of Arizona
Questions and Comments: trees@ece.arizona.edu
Digital Image Analysis Laboratory and
Laboratory for Tree Ring Research © 2000